

Bright, bouncy, and full of nostalgia jello eggs with mold are back, and better than ever! In this article, we’re diving into how to make these vibrant treats from scratch, how to avoid sticky molds, and how to get creative with colors and presentation. Whether you’re prepping for Easter, brunch, or just want a fun project with the kids, this guide will help you master jello eggs the right way. Let’s get cracking.
Table of Contents
My Story with Jello Eggs
Why I Love Making Jello Eggs
I still remember the first time I saw a tray of jello eggs at a family Easter picnic. I was eight, and those colorful, shimmering ovals looked like magic. That moment sparked my fascination with molded foods. As I grew older and embraced my passion for health-conscious cooking, I knew I had to reimagine those sugary gelatin eggs into something fun and functional.
Now, I use protein-packed gelatin blends or sugar-free options to craft jello eggs with mold that still bring the joy but also support the lifestyle I live and teach. These aren’t just desserts; they’re memory-makers and conversation starters. Every time I bring them to a holiday table or kid-friendly event, someone asks, “How did you make these?”
How This Recipe Fits My Clean Cooking Philosophy
As a chef who believes food should fuel our strength, I’ve always sought ways to blend childhood favorites with nutritious choices. Jello eggs can easily align with clean eating. By swapping traditional gelatin for brands with added collagen or using natural fruit juice bases, you can keep the joy while upgrading the ingredients.
They’re also perfectly portioned. No slicing, no scooping. Just a quick pop from the mold and onto the plate. For busy, health-conscious women (and moms!), they’re a dream. Plus, kids absolutely love them. This recipe lets you have fun while staying focused on your wellness goals.
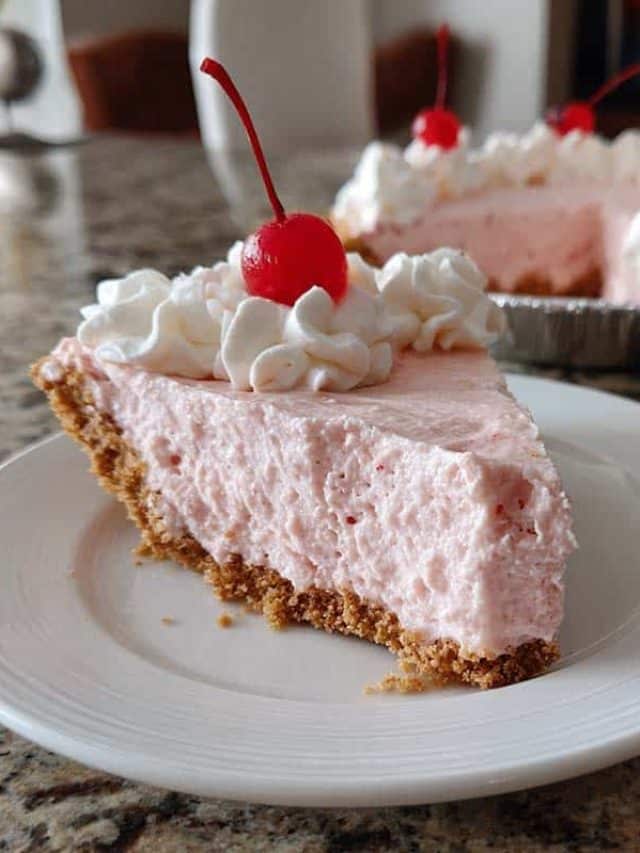
Looking for another family-friendly nostalgic dish? You might enjoy our jello key lime pie or take a peek at the cool whip pie jello version that’s equally eye-catching.
Print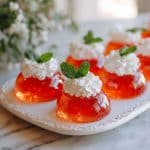
Jello Eggs with Mold – Fun, Colorful Treats Kids Love
Description
These jello eggs with mold are bright, nostalgic, and fun to make. Great for Easter, brunch, or kid-friendly treats customize flavors and colors to match any vibe.
Ingredients
- 2 boxes flavored gelatin (sugar-free or regular)
- 1 1/2 cups boiling water
- 1 cup cold water
- Egg-shaped plastic or silicone molds
- Non-stick spray or neutral oil
Instructions
1. Lightly grease the inside of your egg molds with non-stick spray or oil.
2. In a bowl, dissolve gelatin in boiling water. Stir well.
3. Add cold water and mix until smooth.
4. Use a funnel to carefully pour liquid into molds.
5. Refrigerate molds upright for at least 4 hours or overnight.
6. To unmold, dip the molds in warm water for 10 seconds, then gently release.
7. Serve on a tray with whipped cream or yogurt for decoration.
Notes
Use different flavors for layered colors.
Add fruit slices at the bottom of molds for extra flair.
Great activity for kids!
Nutrition
- Serving Size: 1 egg
- Calories: 45
- Sugar: 6g
- Sodium: 50mg
- Fat: 0g
- Saturated Fat: 0g
- Unsaturated Fat: 0g
- Trans Fat: 0g
- Carbohydrates: 7g
- Fiber: 0g
- Protein: 2g
- Cholesterol: 0mg
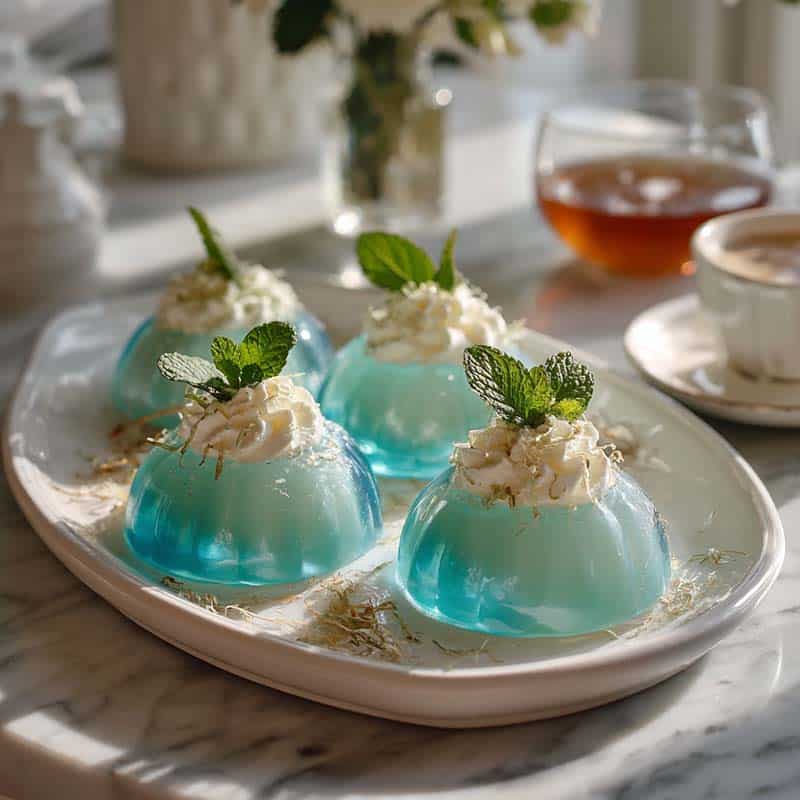
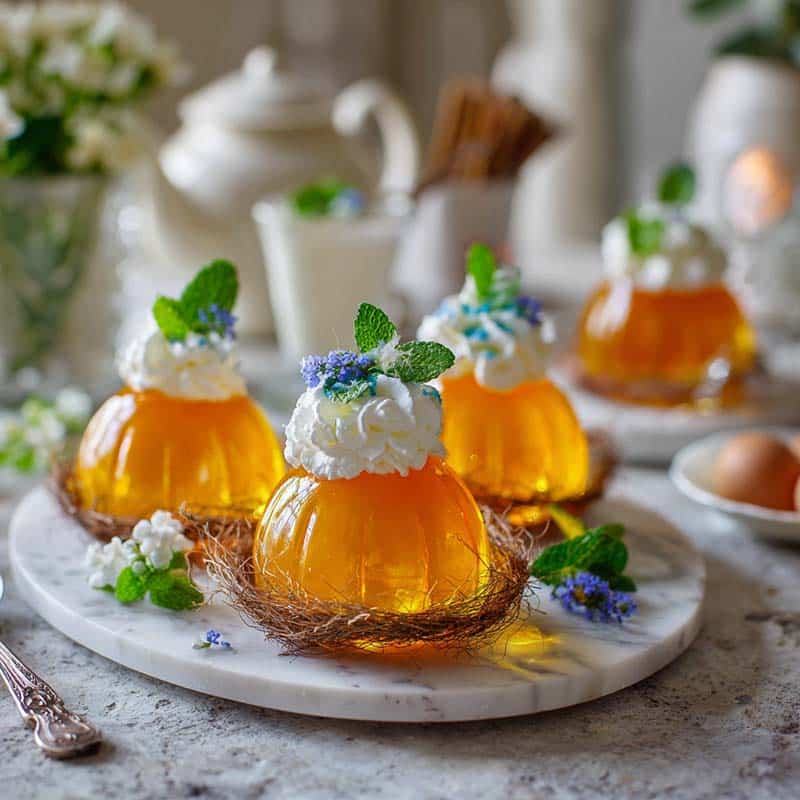
Mastering the Jello Egg Mold Technique
Step-by-Step Guide to Using Egg Molds
When it comes to making jello eggs with mold, success is all about prep and patience. Start by selecting your molds classic plastic egg molds or food-grade silicone versions work great. Before you pour anything, lightly spray the inside of each mold cavity with non-stick cooking spray or a dab of neutral oil on a paper towel. This makes all the difference when it’s time to pop them out later.
Next, prepare your gelatin according to package directions. If you’re going for high-protein versions, dissolve collagen-rich gelatin powder in warm water and flavor it with fruit juice or natural extracts. Once the mixture is smooth and lump-free, use a small funnel or squeeze bottle to pour it into each mold cavity slowly. Don’t fill to the brim leave just a touch of space to allow for expansion as it sets.
Gently close the molds and place them upright in the fridge. Setting usually takes about 3 to 4 hours, but overnight yields the best firmness. To remove, dip the closed mold in warm (not hot) water for 10 seconds, then carefully open it. The eggs should slide right out smooth and glossy.
Need visual fun ideas too? Try our key lime pie trifle for a layered dessert that’s just as vibrant!
Best Gelatin Flavors and Layering Ideas
Now let’s talk flavor and flair. Traditional strawberry, grape, and orange are always hits with kids but if you’re making these jello eggs with mold for brunch, consider adult-friendly flavors too. Mango-passionfruit or lemon-ginger pair beautifully with yogurt-based dips or whipped cream.
Want layered eggs? Let each layer cool and set slightly (about 15–20 minutes) before adding the next one. Pouring warm liquid on fully set jello can cause melting, so go slow. With clear molds, you can see the layers form it’s like edible art.
Looking for another creative gelatin idea? Our lemon jello cake is a visual masterpiece and flavor bomb in one.
Avoiding Sticky Situations – Mold Troubleshooting
How to Prevent Jello from Sticking to Molds
One of the most common frustrations when making jello eggs with mold is the dreaded stick. You go to open your mold, and half the egg stays behind. But don’t worry with a few smart tricks, your eggs will slide out like a dream.
First, always grease your molds lightly. A non-stick cooking spray is ideal, but a tiny bit of neutral oil rubbed on with a paper towel also works. This creates a gentle barrier between the mold and the jello, making removal much easier. For silicone molds, this step can often be skipped, but it still helps for ultra-smooth results.
Second, when it’s time to unmold, dip the entire mold (still closed) into warm water for about 10–15 seconds. This loosens the edges without melting the jello. Don’t submerge it too long just enough to warm the outer surface. Then open the mold slowly, and voilà! Perfect eggs.
Still having trouble? Lay a warm towel around the mold or press gently from the back of silicone cups. And always chill your jello eggs with mold long enough overnight is best for structure.
If you enjoy mastering prep techniques like this, you’ll love our creamy smothered chicken over rice which also relies on smart kitchen tips for great results.
Can You Use Silicone or Plastic Molds?
Yes, and each type has its pros. Plastic molds especially the classic snap-close Easter egg kind are iconic and easy to find. They’re great for kids’ parties and make uniform shapes. Just be sure to oil them and let the gelatin set fully before unmolding.
Silicone molds, on the other hand, are easier for delicate recipes and often don’t need greasing. Their flexibility allows you to peel the mold back from the jello, rather than pulling the jello out. This makes them perfect for intricate shapes or layered effects.
Want more flexible recipes that adapt to your style? Try our crispy cheddar corn potato fritters, which are also mold-friendly and mess-free.
Decorating and Serving Jello Eggs
How to Color Eggs with Jello for Fun Effects
Jello isn’t just a dessert it’s also a surprising way to bring natural color to hard-boiled eggs. While jello eggs with mold are made entirely of gelatin, you can use liquid jello mixtures as edible egg dye too. Just prepare different colors of gelatin in separate bowls and let them cool to room temperature. Then gently submerge peeled or shell-on hard-boiled eggs for a few minutes. The results? Soft pastel tints or vibrant hues, depending on how long you soak them.
It’s a safe, fun way for kids to “paint” eggs without artificial dyes. Plus, if you use shell-off eggs, they’ll be flavored too imagine a slightly fruity boiled egg slice on a brunch plate. It’s quirky, but it works!
For a full jello-based brunch, pair these colorful creations with pineapple strawberry pound cake a light, festive finish.
Creative Presentation for Easter or Brunch
Now that your jello eggs with mold are beautifully shaped and vibrantly colored, it’s time to plate them like a pro. For Easter, arrange them in paper grass “nests” or on a bed of whipped cream. For adult tables, serve on slate platters with fruit slices, mint leaves, or yogurt drizzle.
Want to boost the protein content? Serve them with a dollop of whipped Greek yogurt and a sprinkle of crushed pistachios or chia seeds. You can also press chopped fruit or edible flowers into the mold bottoms before pouring in the gelatin to create beautiful floral patterns on the egg surface.
Need another showstopper side for your table? Check out the street corn chicken rice bowls for a savory companion to your sweet jello egg display.
Decorating and Serving Jello Eggs
How to Color Eggs with Jello for Fun Effects
Jello isn’t just a dessert it’s also a surprising way to bring natural color to hard-boiled eggs. While jello eggs with mold are made entirely of gelatin, you can use liquid jello mixtures as edible egg dye too. Just prepare different colors of gelatin in separate bowls and let them cool to room temperature. Then gently submerge peeled or shell-on hard-boiled eggs for a few minutes. The results? Soft pastel tints or vibrant hues, depending on how long you soak them.
It’s a safe, fun way for kids to “paint” eggs without artificial dyes. Plus, if you use shell-off eggs, they’ll be flavored too—imagine a slightly fruity boiled egg slice on a brunch plate. It’s quirky, but it works!
For a full jello-based brunch, pair these colorful creations with pineapple strawberry pound cake—a light, festive finish.
Creative Presentation for Easter or Brunch
Now that your jello eggs with mold are beautifully shaped and vibrantly colored, it’s time to plate them like a pro. For Easter, arrange them in paper grass “nests” or on a bed of whipped cream. For adult tables, serve on slate platters with fruit slices, mint leaves, or yogurt drizzle.
Want to boost the protein content? Serve them with a dollop of whipped Greek yogurt and a sprinkle of crushed pistachios or chia seeds. You can also press chopped fruit or edible flowers into the mold bottoms before pouring in the gelatin to create beautiful floral patterns on the egg surface.
Need another showstopper side for your table? Check out the street corn chicken rice bowls for a savory companion to your sweet jello egg display.
Frequently Asked Questions
How to prevent jello from sticking to mold?
Lightly grease your molds with non-stick spray or neutral oil before filling. After setting, dip the closed mold in warm water for 10–15 seconds to loosen the jello. This helps release the eggs smoothly without breaking them.
How long does it take for jello eggs to set?
Jello eggs typically take 3–4 hours to set in the fridge. For best results and firmer texture, chill them overnight before unmolding.
Can you use jello to color eggs?
Yes! You can dye hard-boiled eggs by soaking them in cooled liquid jello for a few minutes. Shell-on eggs will be beautifully tinted, while peeled eggs will also absorb a light fruity flavor.
Will jello set in silicone molds?
Absolutely. Silicone molds are excellent for gelatin recipes. They often don’t require greasing and allow easy removal by simply peeling the mold away from the jello.
Conclusion
Making jello eggs with mold is more than just a cute Easter tradition—it’s a colorful, creative way to engage with food and bring smiles to your table. With the right molds, a few tips for clean unmolding, and some flavor creativity, these little ovals become a fun, nutritious treat that both kids and adults will adore.
Whether you’re using them as a holiday showpiece or a playful snack, jello eggs can be customized to match your health goals and your mood. And with options for high-protein, sugar-free, or naturally flavored versions, you’re in control of what goes in and how it turns out.
📌 About this recipe
This recipe is part of a collection curated by Joudia DeROSA — a professional chef specializing in clean, high-protein meals designed to support women’s wellness and energy. Whether you’re into fitness, weight loss, or just crave tasty protein-packed dishes, this blog offers easy, flavorful recipes rooted in balance and nutrition. Follow Joudia on Facebook and Pinterest for daily inspiration and protein-rich meal ideas.